How to Draw an Eye: For Beginners
5:13 PM
I know for a fact that all of us have different drawing styles. Some may prefer drawing in a neat manner, while some prefer otherwise. I’m just going to put it out there that I am by no means a pro at drawing. Actually, I’m merely learning different styles myself because I learned that experimenting or trying something new will help you find a style of your own.
YOU’LL NEED:
- A pencil
- An eraser
- A piece of paper
Without further ado, I give you
the easy techniques I use to draw an eye.
STEP 1: Draw the outline of your
chosen eye shape

Start off by drawing the outline
of your eye with very little pressure to prevent you from making mistakes. In
order to draw the eye shape, you have to start with a curve, then when you
reach the right part of the eye, slowly drag your pencil to the left until you
reach the tear duct area.
STEP 2: Draw the tear duct,
waterline and the iris

After drawing the outline of the eye, draw
the waterline; it’s the tiny line above the lower area of the eye. Next, you
have to draw the iris. Some may think that the iris has to be in the center,
but if you observe an eye up close, you’ll see a tiny space between the south
part of the iris and the waterline.
STEP 3: Draw the upper crease, iris and the eyebags

Lightly draw the upper crease
above the eye. The distance between the eye and the crease depends on you
entirely, since there are different kinds of eye shapes. After, draw the eyebags just below the waterline (optional). Then, draw the pupil inside the iris.
Personally, I prefer drawing crescent-shaped pupils, but it’s all up to you on
how you want to draw it. Do a little shading on the crease, eyebags and outside the
pupil.
STEP 4: Fill in the iris

I find it helpful to use light
strokes while shading the iris, but if you prefer to do something else, then go
ahead. It’s important to keep in mind that we all have different styles, so it
would be really good if you apply a unique pattern of your own while shading.
Do not forget to leave an unshaded circle beside the pupil.
STEP 5: Finish up the shading
inside the iris

This is the part where you get creative.
There are different ways to shade the iris. You can either darken the iris
entirely or you can leave a few unshaded spots/lines. The first thing I did was
shade the outer edges of the iris. Then added a few lines by using dark pencil strokes coming out from the pupil towards the outer edges.
STEP 6: Draw the upper eyelashes

Draw confident strokes on your
eye for your lashes, but don’t be afraid to mix it up a little by drawing lashes over each other. After, darken your lashes, so it will be more prominent.
STEP 7: Draw the lower eyelashes

Keep in mind that it doesn’t have
to be perfect because if you look at your lower lashes, they aren’t straight
and even. As I said earlier, don’t be scared to mix it up a little.
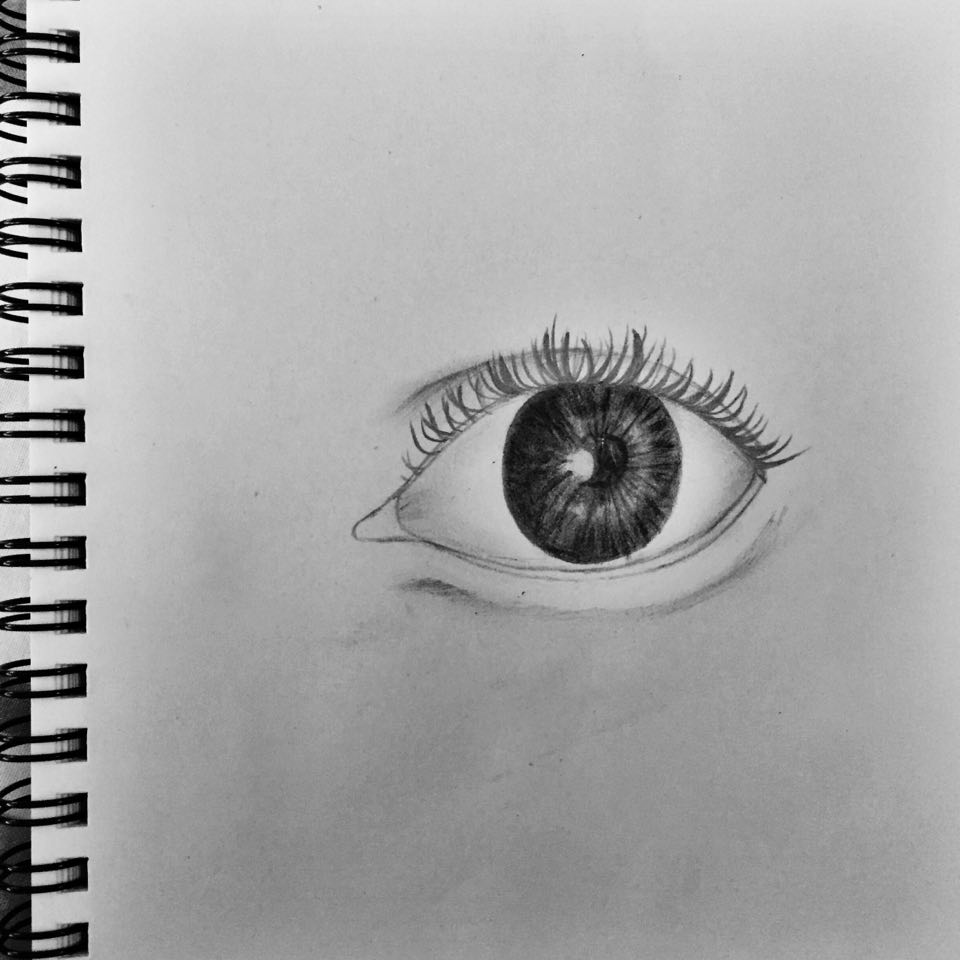
STEP 8: Don’t forget the details!

This is the part wherein you get
to add more details, and shade the eye or even around it until you’re completely
satisfied with your drawing. This technique can add more depth and dimension to your eye!
Then you’re done! Keep in mind
that the technique I used is my personal preference, so this is my way of
drawing an eye. Thank you for reading and I hope you found this tutorial helpful in any way.


0 comments